Phil Hurvitz
Securing UNIX Servers with the Secure Shell (ssh)
Because a substantial amount of GIS users are still running
UNIX servers and as the Internet becomes more vulnerable to compromises
in security, some tools have recently become available to add
a higher degree of security to UNIX client/server environments.
This paper discusses the use of one of these tools, the secure
shell (ssh). Discussion includes installation and running of the
ssh daemon, as well as the use of Windows and UNIX ssh clients.
General Overview
What does any of this have to do with
GIS?!
What this paper is (and is not)
Who this paper is for (and is not)
The Secure Shell (ssh)
Conclusion
What does any
of this have to do with GIS?!
Many organizations, most notably those needing "industrial
strength" GIS, still use UNIX
Recent developments in GIS software have focused on Wintel
technology, such as the COM components build into ArcInfo 8.X.
However, many enterprise GIS solutions still rely quite heavily
on UNIX. SDE applications have proven to be most stable under
UNIX, and many of the RDBMSs, on which these applications are
based, are UNIX-based.
Many components of the Network still rely on UNIX servers
The majority of http and ftp servers that make up the Internet
are hosted on UNIX servers. Windows NT and 2000 have proven to
provide decent service, but most system administrators still
concede that high-end UNIX servers are more stable and scalable
than NT servers. In addition, many of the problems experienced
on NT (e.g., the LoveBug e-mail virus) are not an issue under
UNIX.
The great interest and investment in Linux will also continue
to propel UNIX well into the century. Security will continue
to be an issue.
What this paper is
- An introduction to securing UNIX servers, clients, and networks
with the Secure Shell (ssh)
- A description of typical ssh setup
- An overview of some sample Windows ssh clients
What this paper is not
- A general discussion of UNIX security
For more general or specific discussions of UNIX security,
try news:comp.infosystems.security.
- A detailed introduction to all of ssh functionality
For all the details, see http://www.ssh.com.
Who this paper is
for
- Anyone administering UNIX servers
System administrators have an obligation to their users and
to the larger community to take reasonable steps to secure their
networks. ssh is a fairly low-effort, but high-benefit method
of introducing a high level of security.
- Anyone using UNIX servers who is concerned about security
If you are using UNIX machines for services such as ftp and
telnet, and you would prefer not to pass your user-id and password
across insecure channels, you should investigate a tool such
as ssh.
Who this paper is not for
- UNIX security experts or full-time UNIX administrators
UNIX security experts will most likely have more knowledge
of securing their networks than is presented here. This information
is geared more toward the occasional UNIX administrator. This
role of combined GIS user and UNIX system administrator is common
within the GIS community. Until fairly recently, UNIX was a necessity
for high-powered GIS; because of this, many users without adequate
training or knowledge of security have been "forced"
into the role of system administrator.
- People not using UNIX as "active" clients or servers
If you are not using a UNIX machine for direct and interactive
access (e.g., ftp, telnet, or any other service that offers an
authentication challenge), you are not in danger of losing control
of your password. However, if you are using these services, you
should be concerned.
- People using UNIX only as anonymous ftp or http servers
If you only use UNIX servers in anonymous ftp or web sessions
to get or put data, you are not actually logging in as a user
with a password. In this case, you need not be concerned with
losing control of security under UNIX.
The Secure Shell (ssh)
Why use ssh?
What is ssh?
How does ssh work?
Setting up ssh
Running the ssh as a process on the
UNIX server
User setup (Key generation)
Tunneling other services through ssh
Windows ssh Clients
ssh ftp (or other TCP port) forwarding
Why
use ssh?
Out-of-the-box UNIX networking is inherently insecure
Why is out-of-the-box UNIX networking inherently insecure?
Simply stated, it is because user-IDs and Passwords are sent
across the wire in CLEAR TEXT!
Here is an image of the way a typical UNIX TCP/IP client/server
process is initiated.
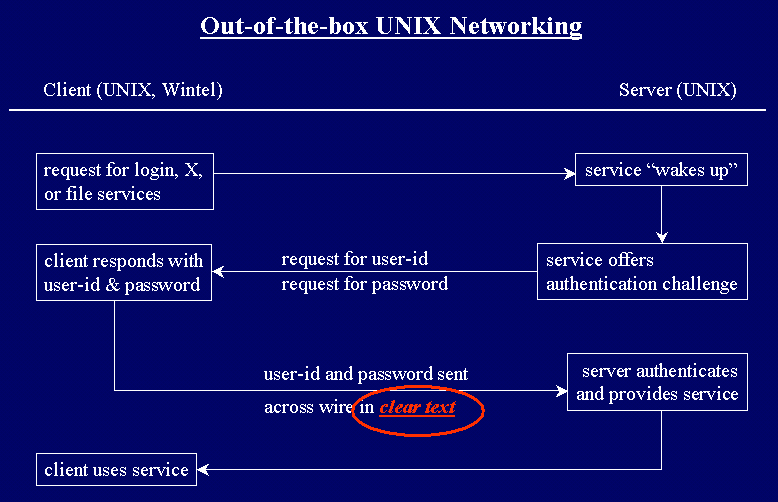
Note that the user-id and password are sent across in clear
text. Proof of this, for the doubtful,
is below.
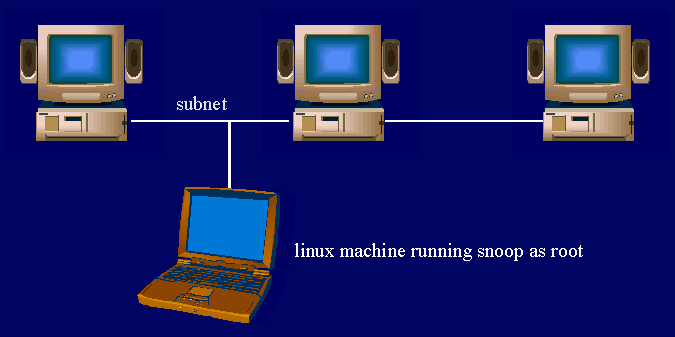
Packet sniffers can easily steal user-ids and passwords.
Use of snoop, sniffit, snort, or other packet sniffers by
malicious users compromises the security of the network. In a
typical networked configuration, a malicious user can plug into
the network with a Linux machine, and snoop network traffic for
user-ids and passwords.
How Insecure is Telnet or ftp?
Any UNIX machine on the subnet can log user-ids and passwords
from ftp or telnet sessions.
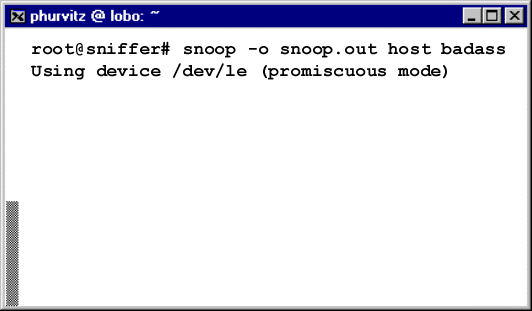
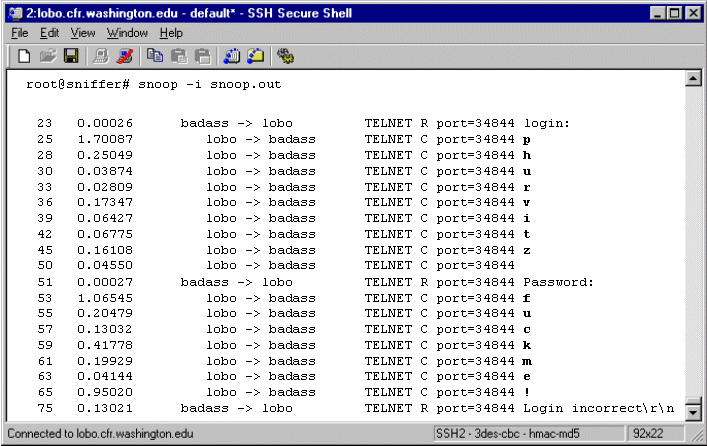
This example uses snoop running on a Solaris 7 machine. A
user logged in as root runs snoop, and logs the
output to a file called snoop.out. This snoop session
is run specifically to log traffic to and from the host badass.
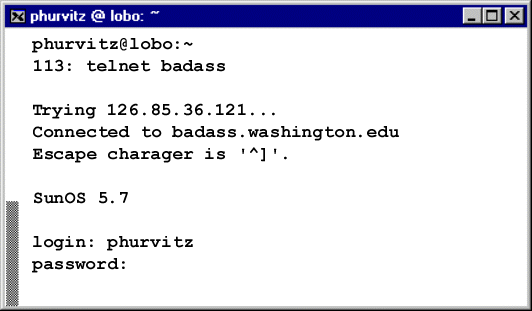
A different user starts a telnet session from a random machine
to the server badass. The typical telnet
session requires the user to enter the login-id and password.
The data transmitted by the telnet session startup is being sent
across the wire in clear text!
Here is the output from the snoop session. It needs to be
decoded from the binary dump format to text (using snoop
-i). The decoded (and edited) snoop output shows the user-id
and password in clear text. Crackers will typically set up filters
so that only login and password data are logged to the output
file. You can see how easy it is to capture the user-ids and
passwords from telnet sessions. How many of you are using telnet
as the root user?
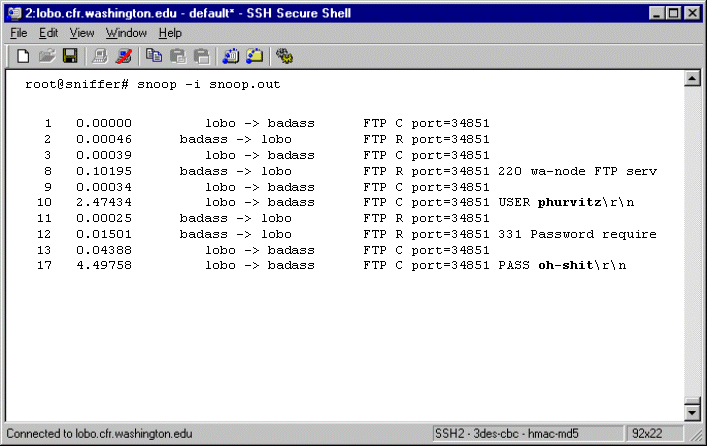
ftp is no more secure than telnet. Here is the decoded and
edited output of a snoop session that has detected an ftp session.
Again, the user-id and password show up in clear text! When was
the last time you used ftp as root?
What
is ssh?
- A method to avoid passing clear text user-ids & passwords
With ssh, clear text user-ids and passwords are never
sent across the wire.
- A method of using strong (e.g., 1024 bit) encryption for
user authentication
All TCP traffic sent through ssh can be strongly encrypted.
As of today (mid-2000), it is practically impossible to break
1024 bit encryption. This means that ssh, if used correctly,
is a completely secure method of communicating across the network.
- A replacement for telnet, rsh, rlogin, rcp
ssh provides the same functionality as the traditional communication
tools, but with the benefit of added security.
- A method of encrypting arbitrary TCP/IP data transmissions
(e.g., X11, ftp, Z39.50)
When used as a tunnel, ssh provides the same level of security
to arbitrary TCP connections. This means that protocols such
as ftp, which are inherently insecure, can be given the same
strong level of encryption as the ssh channel.
How
does ssh work?
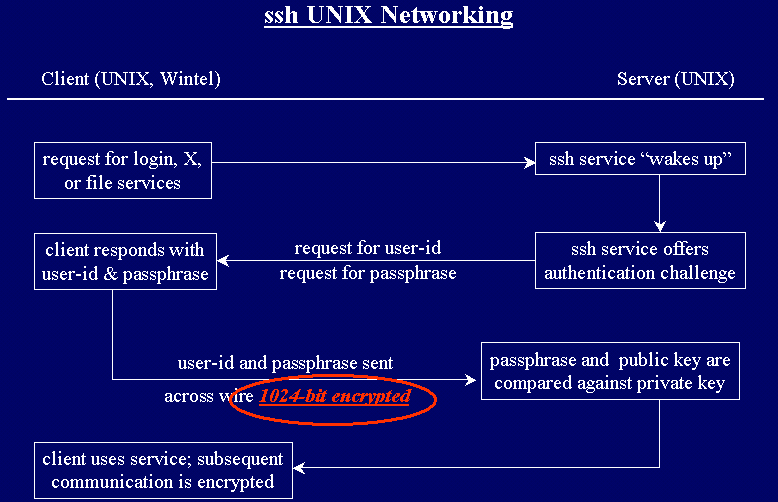
- Uses public key encryption (hyperlink)
- Encryption key is public, but decryption key is kept private
- User-ids and passwords are never passed in
clear text
Here is an image of the way a typical UNIX TCP/IP client/server
process is initiated with ssh.
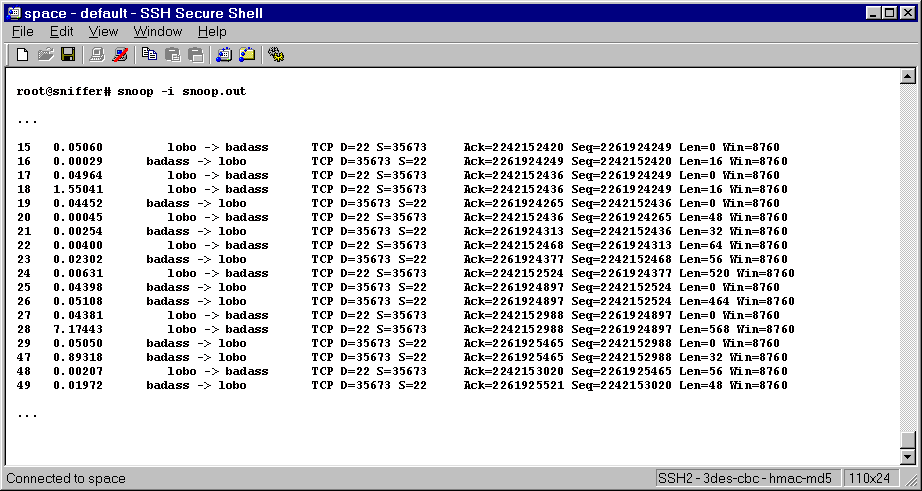
Here is some output of a snooped session where ssh is used,
rather than telnet:
The connection is made using ssh
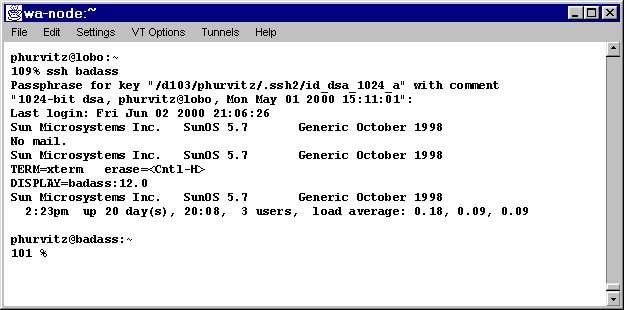
A snoop does not show either the user-id, password, or the
passphrase. The same encryption takes place for any transmissions
across the ssh channel.
Setting
up ssh
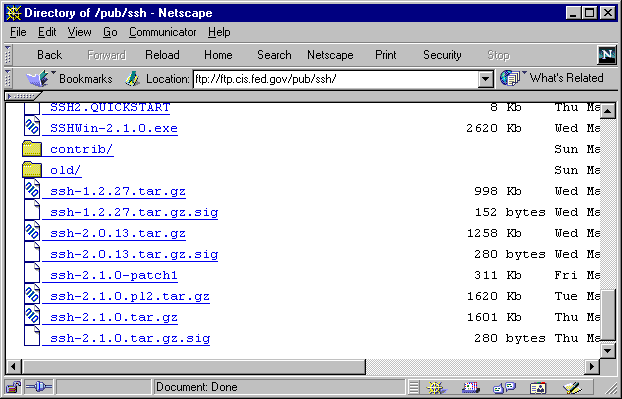
Download
- Visit www.ssh.com or a
local mirror
- Get the latest ssh1 and ssh2 server/client tarballs
- Get the latest Windows ssh client
Compile
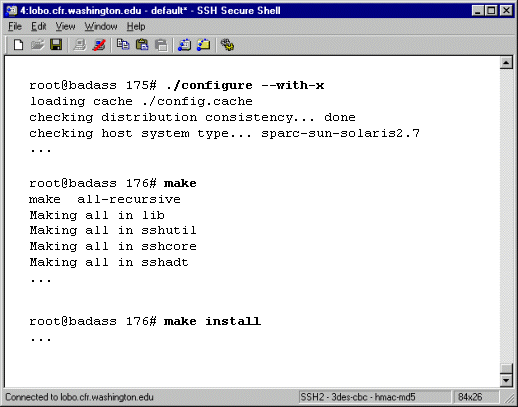
ssh is built to use standard GNU compiling tools (e.g. GNUmake,
gcc). Compiling is usually uneventful.
Make sure to read any explanatory files in the distribution
tarballs; this will tell you what options exist for configuration.
Enable ssh1 compatibility
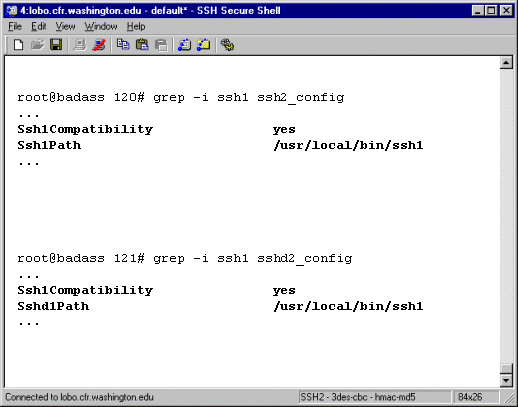
If you will be connecting to servers that only run ssh1, or
if you are using clients that only use ssh1, you should download
and compile both ssh1 and ssh2. It is possible to run ssh2 with
ssh1 backwards compatibility. Instructions on how to do this
are in the "Quikstart" file in the ssh2 tarball.
Essentially, the process involves altering a few configuration
files.
Running
the ssh as a process on the UNIX server
ssh can be made to start up in several different ways.
Set up as daemon to start at boot
- Create or copy an existing startup script in
/etc/init.d
- Create a symlink to
S... and K...
scripts in /etc/rc3.d
- Start the sshd daemon
The sshd daemon will respond to incoming ssh requests
- sshd will offer an authentication challenge across an encrypted
channel
- sshd will spawn a new shell, but across an encrypted channel
Set up as inetd process
- Alter the
/etc/inet/inetd.conf file:
ssh stream tcp nowait root /usr/local/sbin/sshd sshd -I
- Alter the /etc/inet/services file:
ssh 22/tcp
- Restart the inetd daemon
A new ssh process will start for each client request
"Encase" in TCP Wrappers
- Compile with TCP Wrapper support
./configure \--with-libwrap=/usr/local/lib/libwrap.a
- Alter
Makefile
-I/PATHOF/tcpwrappers

      WRAPLIBS = -L/PATHOF/tcpwrappers -lwrap
- Alter
/etc/hosts.allow and /etc/hosts.deny,
following rules from TCP Wrappers
- Run ssh2 as a daemon
Connections will be logged to /var/log/syslog
User
setup (Key generation)
Create key pairs
Use the executables ssh-keygen and/or ssh-keygen2
to create private key and public key.
- Only the owner should have the private key.
- The public key is available to anyone.
- Data are encrypted with public key.
- Decryption is possible only with the private key.
- The private key is encrypted with the passphrase in case
of file system security breach.
Set up important authorization files
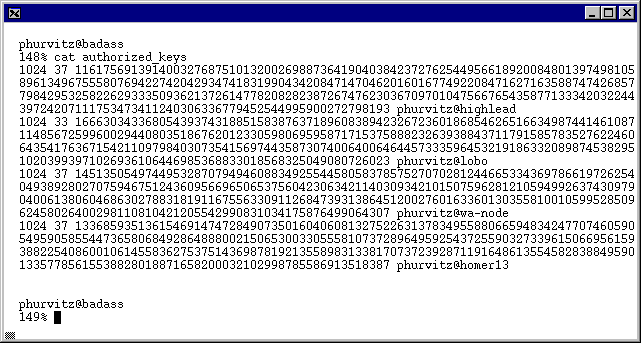
Setup of Authorization Files under ssh1
- Copy all personal public keys as single lines in
~/.ssh/authorized_keys.
An ssh1 connection to the server will read the authorized_keys
file and encrypt data with the correct host key.
- Make sure that each of the keys occupy only a single line
in the file. If you cut-and-paste from one shell to the other,
be sure to remove extraneous newlines.
Setup of Authorization Files under ssh2
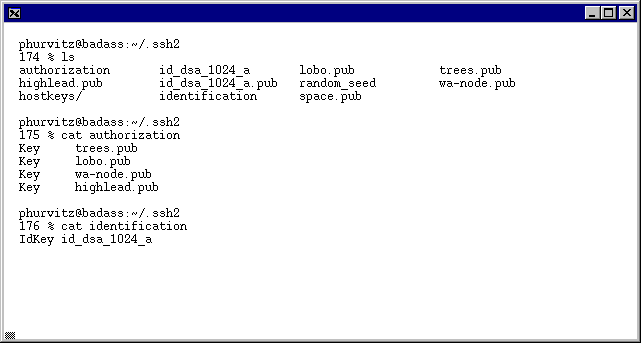
Edit a few important files in ~/.ssh2. These
files will allow correct encryption of data.
The files are authorization and identification.
Copy public keys to remote hosts
The public keys should be copied to the ~/.ssh
and ~/.ssh2 directories on remote hosts. The private
key should be saved only on the local host.
Tunneling
other services through ssh
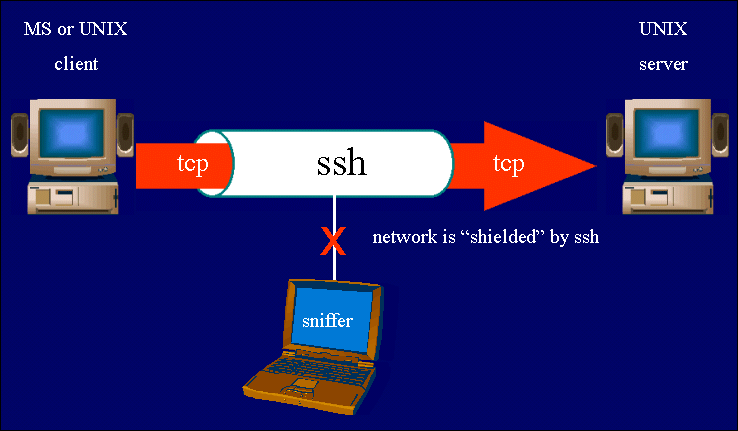
ssh allows arbitrary TCP connections to be forwarded through
the secure ssh channel. In this way, the TCP connection is "shielded"
by ssh security and encryption.
Tunneling X11 Through ssh
- Native X11 is an insecure channel, however, ...
- X11 can be tunneled through ssh
- X11 forwarding must be compiled in (default)
- DISPLAY variable should not be set manually, otherwise the
ssh tunnel will be bypassed
- New DISPLAY variable will be "
host:X.0"
(where X > 0)
- X11 displays will forward from host to client through ssh
- If local X server is running (e.g., eXceed), X displays are
automatically forwarded to PC
- X11 tunneling is default behavior if X11 support is compiled
in
Tunneling ftp Through ssh
UNIX clients
- Set up a forwarded port
myhost% ssh -L 1234:host:21 host
- Establish ftp connection to local port
myhost% ftp localhost 1234
ftp transmissions take place through encrypted channel
Windows clients
Use client's tcp forwarding (discussed later for each
Windows client)
Windows
ssh Clients
TeraTerm
MindTerm
SSH Secure Shell
Others exist. See http://www.slurping.com/ssh.html
TeraTerm
TeraTerm Startup
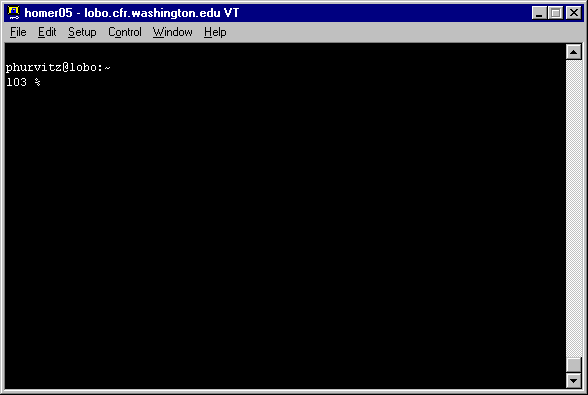
TeraTerm ssh1 authentication uses the local private key and
passphrase.
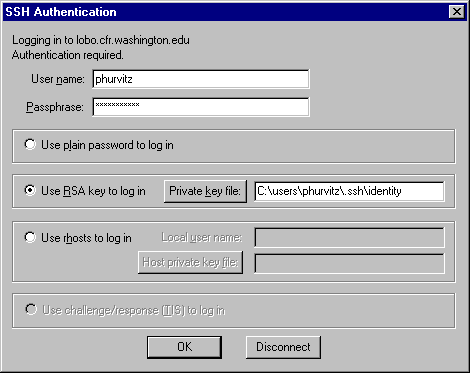
The interface is a typical terminal session, much like any
familiar telnet.
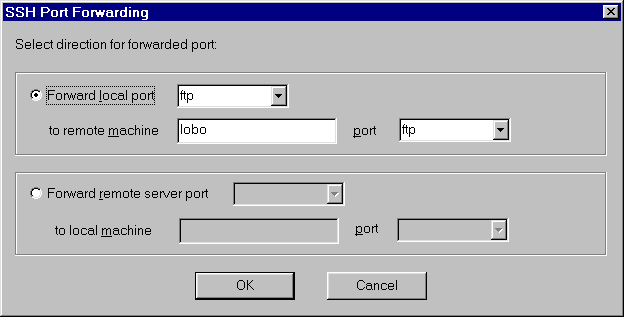
TeraTerm Port Forwarding
Port forwarding is easy and straightforward.
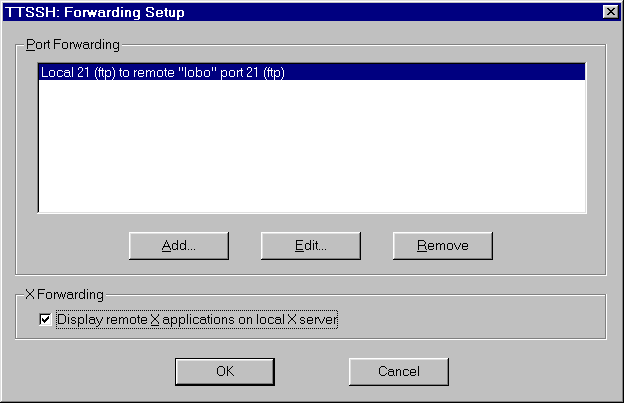
Any forwarded ports can be viewed, edited, or deleted.
Simply checking the "X Forwarding" box will redirect
X11 displays to a local X11 server such as eXceed or ReflectionX.
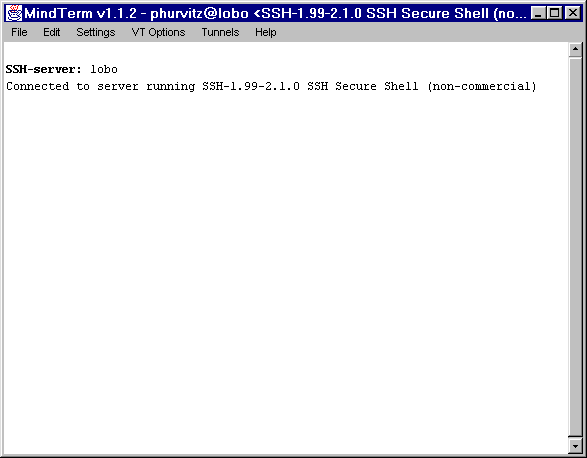
MindTerm
MindTerm Startup
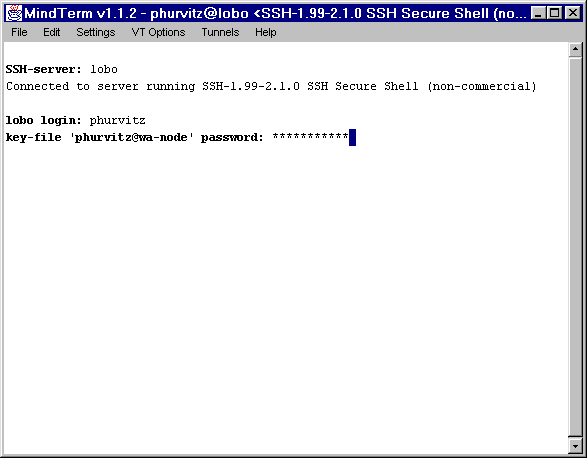
MindTerm shows the version(s) of ssh running on the server.
Authentication requires the passphrase.
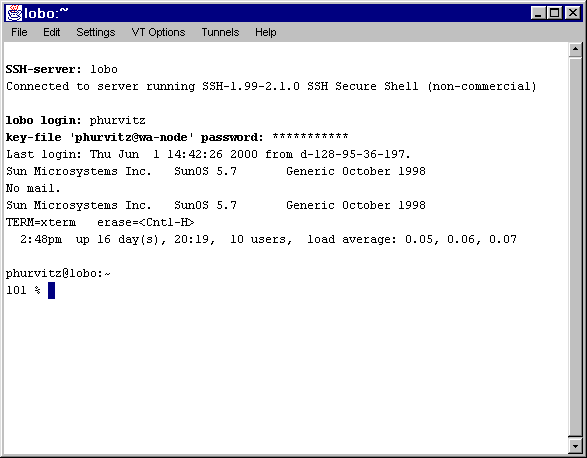
Once authenticated, MindTerm functions much like any familiar
terminal session.
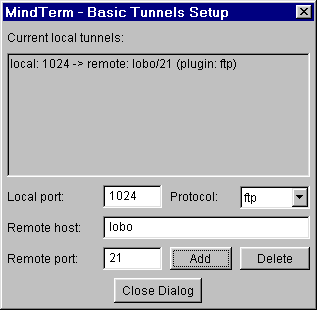
MindTerm Port Forwarding
MindTerm's interface for setting up port forwarding takes
a little more knowledge of port numbers on UNIX hosts.
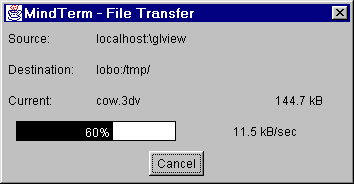
MindTerm Secure Copy (scp)
MindTerm also has an interface for secure copying of files.
Files can be copied either direction. Recursive copying can copy
entire directories between client and host.
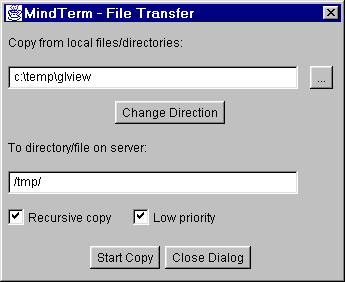
MindTerm's scp has a progress indicator for each file that
is transferred.
SSH
Secure Shell
- Free (for non-profit) telnet-like ssh2 client
- Uses ssh2 protocol only (more secure)
- Built-in graphical scp2
- Can tunnel services (e.g., X11, ftp)
- Download:
http://www.ssh.com/
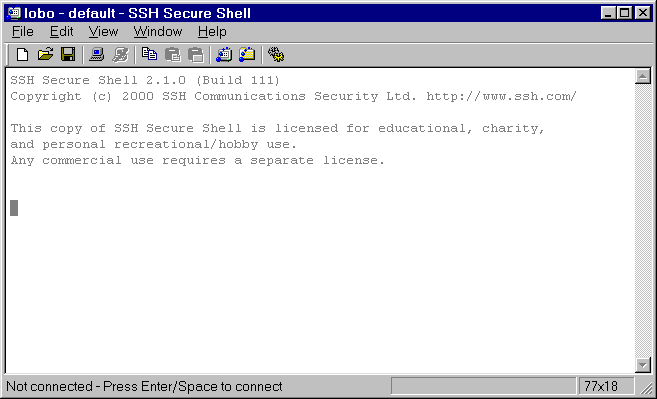
SSH Secure Shell Startup
SSH Secure Shell starts without a connection.
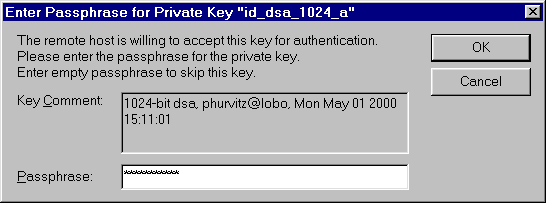
Authentication can use normal UNIX password, but across encrypted
channel.

If no password is provided, and keys & files on host are
set up properly, SSH Secure Shell will ask for the passphrase
to decrypt the private key.
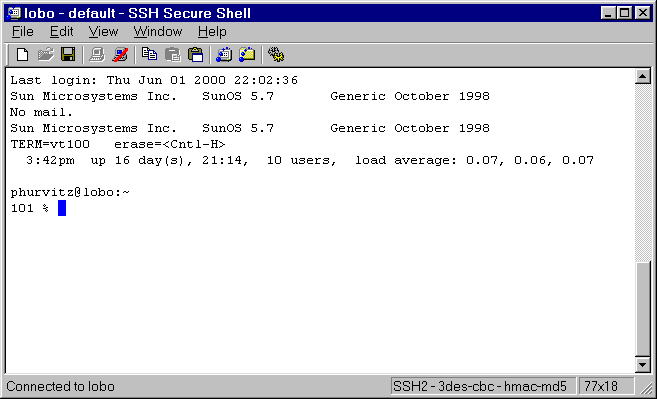
After authentication, SSH Secure Shell functions like other
terminal clients.
SSH Secure Shell X11 forwarding
If X11 support is compiled in, and if a local X11 server (e.g.,
eXceed, ReflectionX) is running, the DISPLAY will automatically
be set. DISPLAY will be host:N.0 (where N
> 0). The local X11 server will act as a proxy for host:N.0.
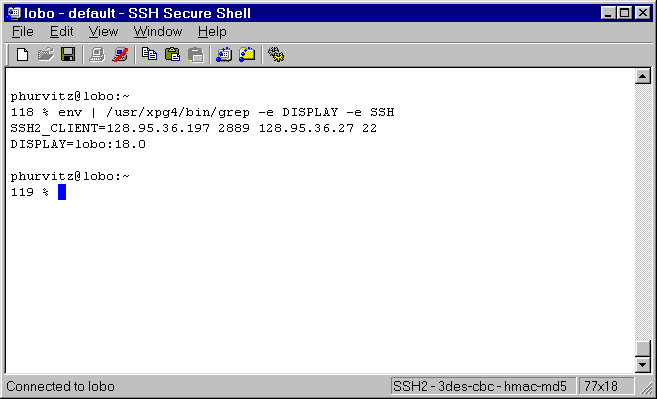
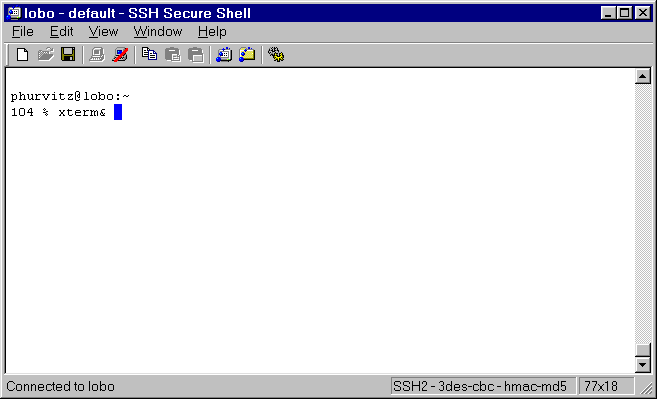
Starting a process that spawns an X display will automatically
forward the X display to the local X server.
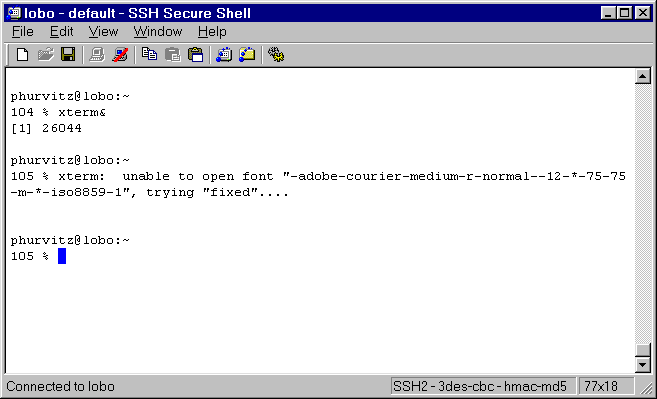
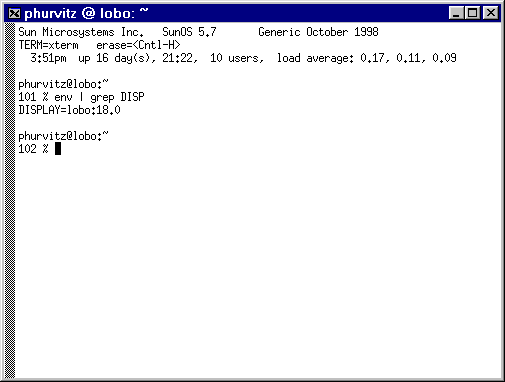
The X display will open on the local X server. The DISPLAY
will continue to be set correctly for subsequent connections
from child shells.
SSH Secure Shell ftp (or other port) forwarding
Port forwarding, as well as other settings, is set up in general
settings.
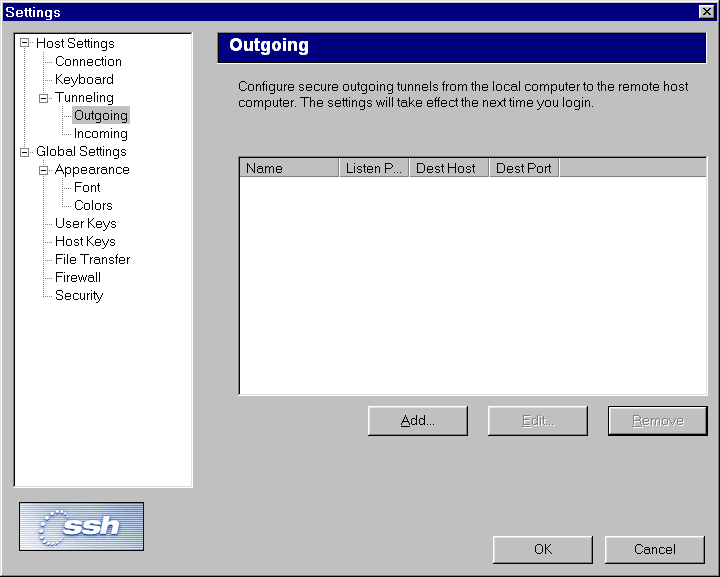
Both incoming and outgoing tunnels can be created. Setup is
straightforward, but requires knowledge of port numbers for services
on server and client.
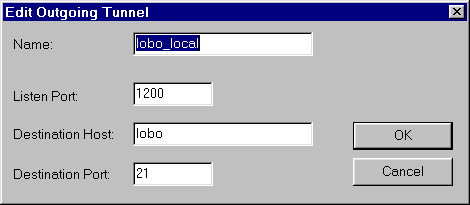
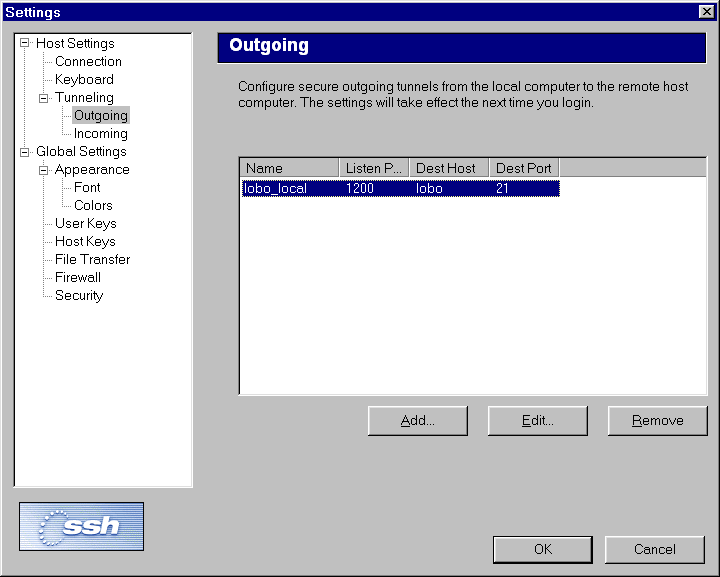
Once set, port forwarding can be altered or deleted. Settings
are saved from session to session, so it is necessary to set
port forwarding only once, unless a change is needed.
SSH Secure Shell scp
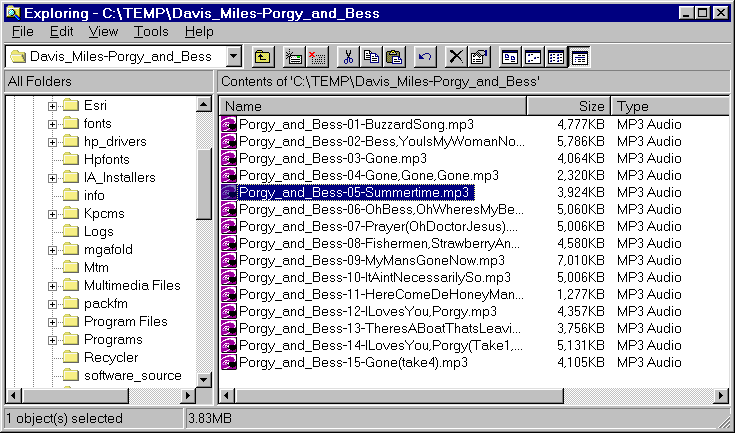
SSH Secure Shell has an easy and intuitive scp interface.
The GUI looks similar to a typical file manager, in which the
file system is shown hierarchically. The interface shows the
file system for the server.
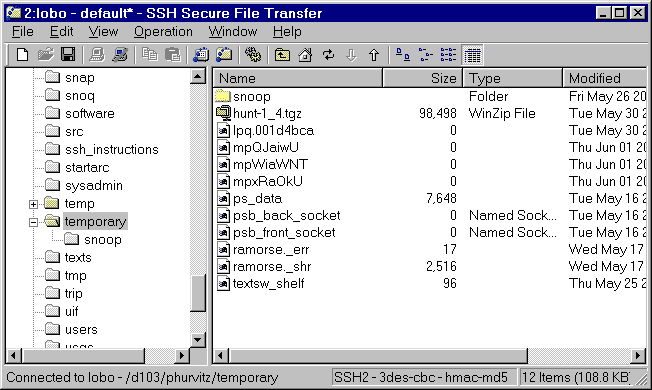
Files can be dragged from the client's Windows Explorer.
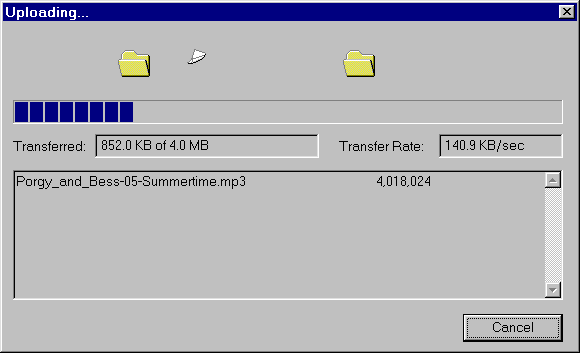
Progress of file copying is indicated, along with the transfer
rate.
ssh
ftp (or other TCP port) forwarding
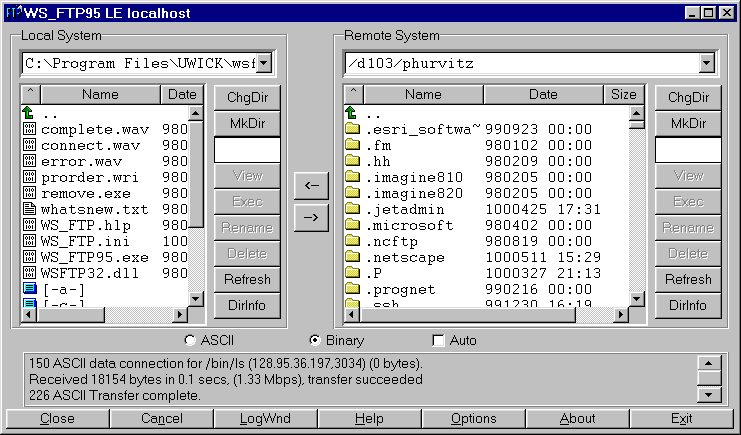
Using ssh tunnels for ftp is easy, once the tunnel has been
established.
- Create an ssh local port redirection to the ftp port on remote
host
- Use Windows ftp client
- Connect to localhost (127.0.0.1)
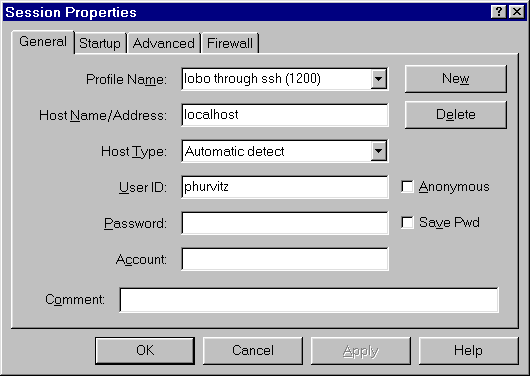
- Use local port from redirection (e.g. 1200) and Passive Mode
for transfer.
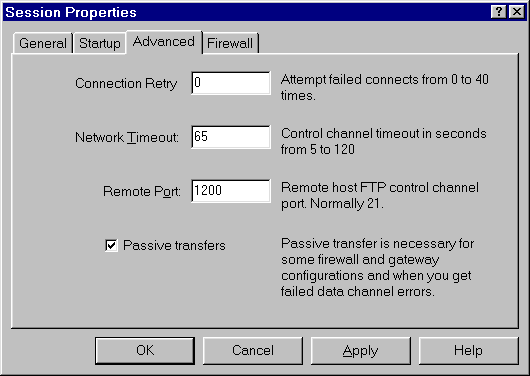
- Once the connection is made, ftp functions exactly as expected,
but the data transfers occur across an encrypted channel.
Conclusion
As the Internet grows in size and number of users, expect
security to become more of an issue.
Using ssh can greatly increase the security of your network.
Setting up and using ssh is fairly straightforward.
Cost-to-benefit ratio for security is high. Software is free;
the only cost associated is administrator and user effort.
Phil Hurvitz (phurvitz@u.washington.edu,
http://lobo.cfr.washington.edu/~phurvitz)
GIS Specialist
College of Forest Resources (http://www.cfr.washington.edu)
355 Bloedel Hall
Box 352100
University of Washington (http://www.washington.edu)
Seattle, WA USA 98195-2100
206.685.8197


